Part Description
Triumph Street Triple 15 Tyre Repair Kit
For emergency use ONLY
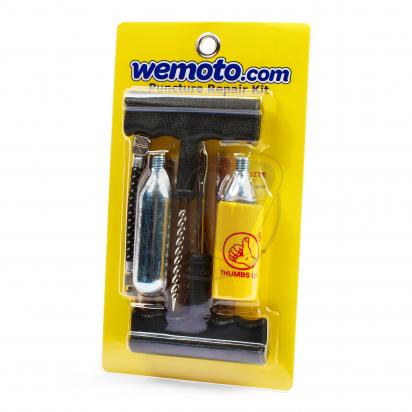
Emergency Tubeless Tyre Repair Kit
Everything needed for emergency roadside repair
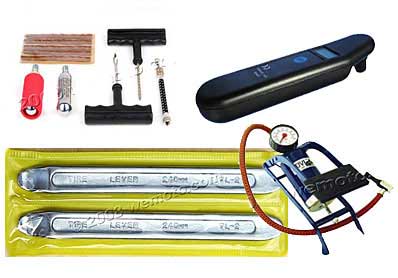
Contents:
- 1 T-Bar 'reamer' tool
- 1 T-Bar 'hook' tool
- 5 strips of sealant
- 1 Air valve adaptor hose
- 2 canisters of compressed CO2 with cover
Full instructions are provided on the back of the packaging
- Locate the puncture hole. please note that only punctures in the tread can be repaired. If towards the outside of the tread or in the sidewall, a repair will not be possible and the tyre must be replaced immediately.
- Insert the T-bar reamer tool and work in and out of the puncture hole until it moves smoothly. This both cleans the puncture hole and makes it large enough to insert the sealant plug without breaking it. Remove the reamer tool.
- Thread the sticky sealant strip through the eye of the hook tool until it is held by the middle.
- Push the hook tool (and sealant strip) through the hole
- Twisting the hook as per the instructions releases the sealant strip, allowing you to pull it out while leaving the sealant to plug the hole.
- Trim off any excess sealant with a knife.
Driving a deflated tire can damage the structural integrity of the tire and sidewalls - the CO2 canisters included provide some inflation to keep you going until you can fully re-inflate at a petrol station or garage.
Delivery and Returns
We want you to be happy with your purchase. If you're not, just return the products to our warehouse. Unless faulty, we'd like this to be within 30 days of purchase. Exceptions apply to certain products.

Changing tubeless tyres can be hard, but with inner tubes, it can be a right pain. Please find below a very helpful article taken from CLASSIC MOTORCYCLE MECHANICS.
Back in the day if you got a puncture you fixed it yourself, often by the side of the road. With the advent of alloy wheels, tubeless tyres, roadside assistance and tyre specialist garages the most involvement many have with those black rubber hoops full of air is taking a wheel off the bike and getting someone else to sort it out.
It's quite common to order up a pair of tyres for an ongoing restoration, drop the freshly built wheels off at your local bike shop and simply collect them the next day. All of this is very convenient but what happens if you've bought some new rubber for a bargain price at a show and your local bike shop or tyre specialist wants a small ransom to fit the tyres? Or what about that damn puncture you inevitably find late on a Saturday night a few hours before you're due out on an early Sunday morning ride? Can you remember how to sort it out; does the workshop manual really explain what to do, have you got the necessary resources to do the job?
Please Note
This information is only a guide and if in doubt about any specific fitting please consult and follow manufacturers recommendations
Running in
A New tyre will need at least 50 miles running in before it gives it best and for the first mile or so can be lethal if thrown hard into a bend for example.
The best tyre in the world will not give it performance until it is up to temperature.
Specification on Side Wall
Moulded/written into the side wall of a tyre is all its specification. In short, it tells you anything that you may need to know about your tyre.
| Example | BT45F 110/80-17 57H |
| Manufacturers Code | BT45 |
| F | Front |
| 110 | Width in millimetres |
| 80 | Height of the sidewall as a percentage of the width. Aspect ratio. |
| 17 | The diameter of the inner rim in inches |
| 57 | Load Capacity of Tyre |
| H | Speed Rating |
Load Capacity
| Index | Capacity in Kilos |
| 62 | 265 |
| 72 | 355 |
| 82 | 475 |
Speed Ratings
These initially increase in 10 KPH increments.
 Battery
 Bearings
 Brakes
 Bulbs
Bulbs
 Chargers
 Clean
Clean
 Covers
 Electrics
 Exhaust
 Fasteners
 Filters
 Forks
Forks
 Lighting
 Lubricants
 Other Categories
 Protection
 Simota
 Tools
Tools
 Transmission
 Tyres
Tyres


